Migrating public folder content to SharePoint is one solution toward the inevitable end of public folders, but it’s only one piece of the puzzle. Users also must be able to post content to SharePoint document libraries as if they were posting content to Exchange public folders. This tip explains how to mail-enable a SharePoint 2010 document library so you can use it like a public folder.
The first step to mail-enable a document library is to install the SMTP server feature on your SharePoint server. To do this, open the Server Manager, go to the Features container and add the SMTP Server (Figure 1).
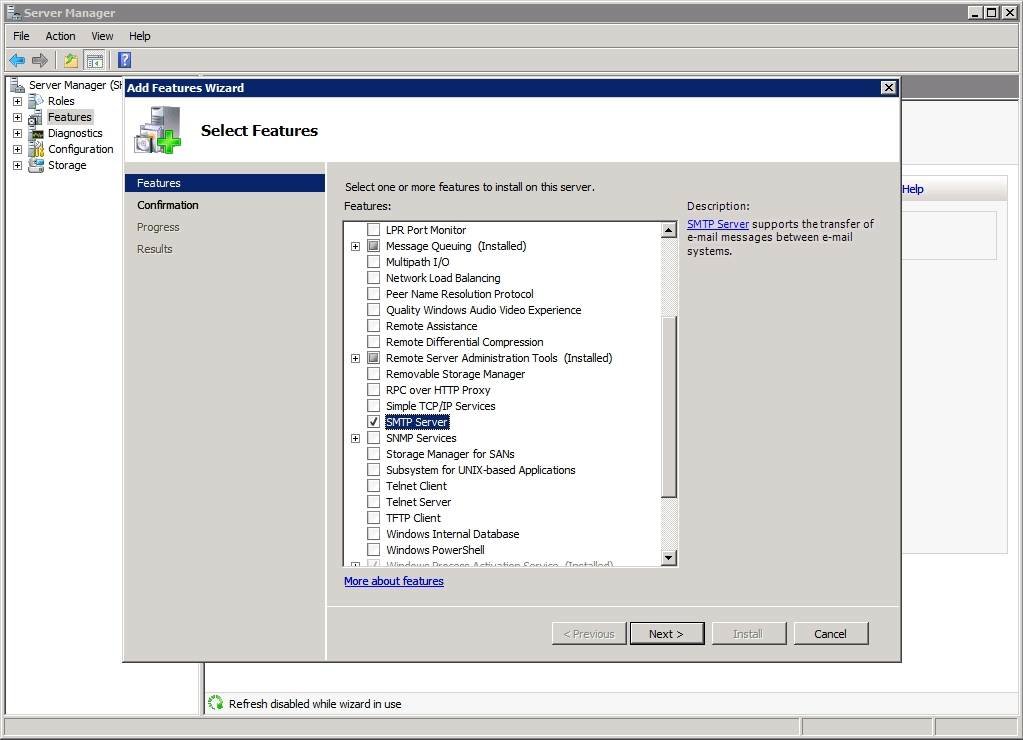
Figure 1. Install the SMTP server feature to start mail-enabling your document library.
Next, configure IIS to use the server via IIS 6 Manager. If this utility is not already installed, use the Server Manager to add it to your existing IIS deployment. Then open IIS 6 Manager and expand the listing for your server.
You’ll see a container called SMTP Virtual Server #1. Right-click on the container and select the Properties command. When the virtual server’s properties sheet opens, go to the Access tab and click Authentication. Next, verify that anonymous access is enabled (Figure 2).
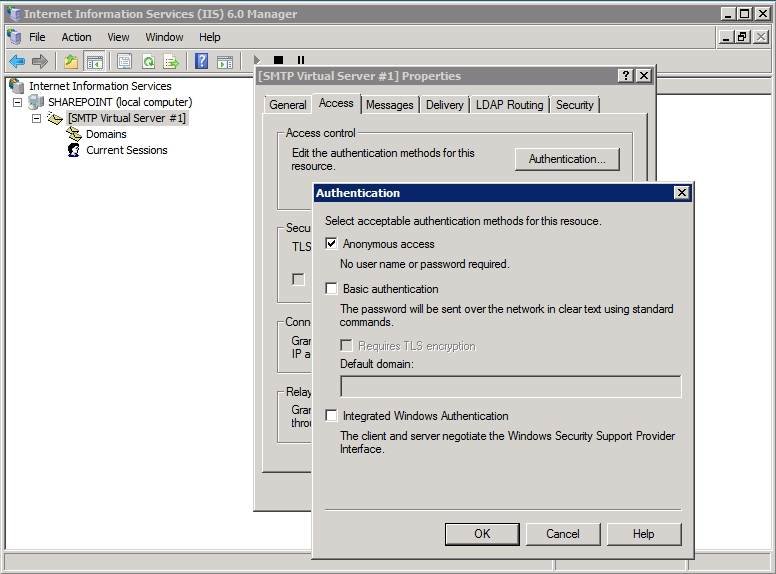
Figure 2. Check that anonymous access is enabled on your SMTP virtual server.
Now go back to the Access tab and click Connection. Ensure that the All Except the List Below option is selected and click OK.
At this point, you’ll need to open the SharePoint Central Administration console and navigate to System Settings -> Configure Incoming E-Mail Settings. When you arrive at this page, click on the Yes option in the Enable Sites on this Server to Receive E-mail section. Next, make sure that the E-Mail Server Display Address section displays the front-end SharePoint server’s fully qualified domain name (Figure 3). After you’ve done that, click OK.
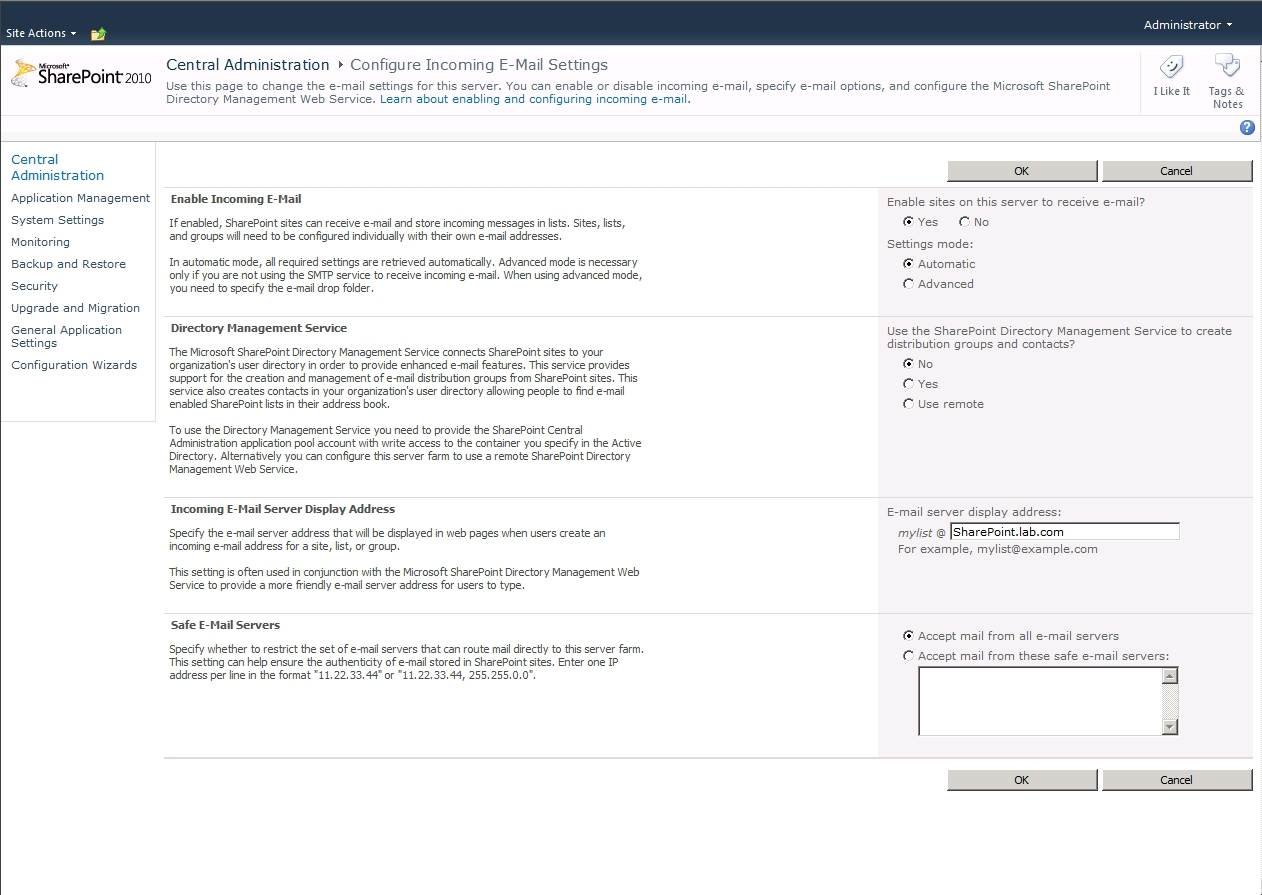
Figure 3. The next step is to enable inbound email for SharePoint .
Close the SharePoint Central Administration console and navigate to the SharePoint site that contains the document library you will mail-enable. Go to the site’s Library tab and then click on the Library Settings button. Locate the Communications section on the Document Library Settings page and click on the Incoming E-mail Settings link.
Go to the Allow This Document Library to Receive E-mail section and select Yes. You’ll also have to assign an email address to the document library (Figure 4).
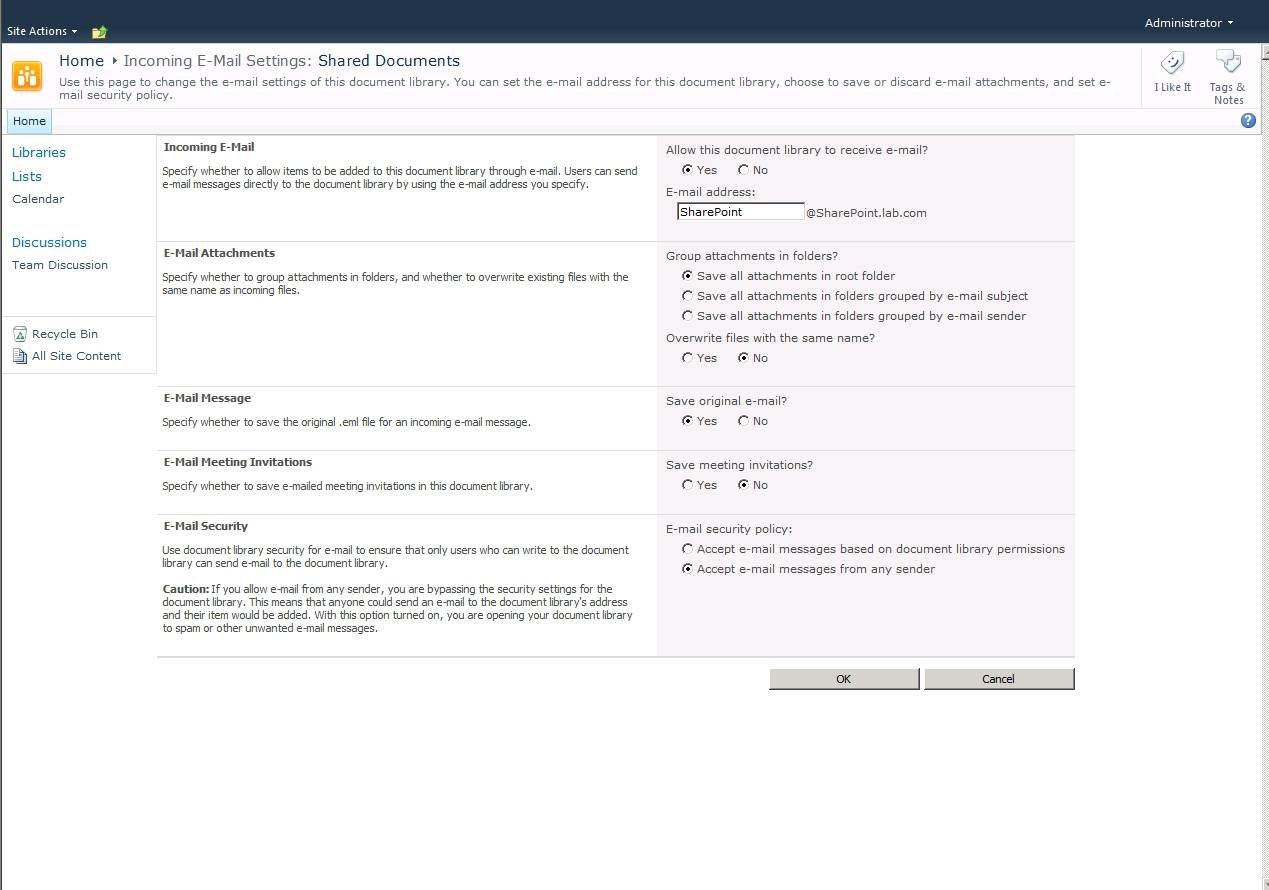
Figure 4. You must assign the SharePoint document library an email address.
Select the Accept E-Mail Messages from any sender option. For now, you’ll want to maintain more open permissions so you can verify that basic connectivity is working. Later, however, you should configure SharePoint to accept messages only from Exchange.
Testing connectivity between Exchange and SharePoint
Once you’ve mail-enabled your SharePoint document library, you should test your ability to send email to the library. Start by opening Outlook and sending a message to the address that you assigned.
At first, I had difficulty getting messages to flow between Exchange and SharePoint. When I looked into this, I discovered two things:
The first step to mail-enable a document library is to install the SMTP server feature on your SharePoint server. To do this, open the Server Manager, go to the Features container and add the SMTP Server (Figure 1).
Figure 1. Install the SMTP server feature to start mail-enabling your document library.
Next, configure IIS to use the server via IIS 6 Manager. If this utility is not already installed, use the Server Manager to add it to your existing IIS deployment. Then open IIS 6 Manager and expand the listing for your server.
You’ll see a container called SMTP Virtual Server #1. Right-click on the container and select the Properties command. When the virtual server’s properties sheet opens, go to the Access tab and click Authentication. Next, verify that anonymous access is enabled (Figure 2).
Figure 2. Check that anonymous access is enabled on your SMTP virtual server.
Now go back to the Access tab and click Connection. Ensure that the All Except the List Below option is selected and click OK.
At this point, you’ll need to open the SharePoint Central Administration console and navigate to System Settings -> Configure Incoming E-Mail Settings. When you arrive at this page, click on the Yes option in the Enable Sites on this Server to Receive E-mail section. Next, make sure that the E-Mail Server Display Address section displays the front-end SharePoint server’s fully qualified domain name (Figure 3). After you’ve done that, click OK.
Figure 3. The next step is to enable inbound email for SharePoint .
Close the SharePoint Central Administration console and navigate to the SharePoint site that contains the document library you will mail-enable. Go to the site’s Library tab and then click on the Library Settings button. Locate the Communications section on the Document Library Settings page and click on the Incoming E-mail Settings link.
Go to the Allow This Document Library to Receive E-mail section and select Yes. You’ll also have to assign an email address to the document library (Figure 4).
Figure 4. You must assign the SharePoint document library an email address.
Select the Accept E-Mail Messages from any sender option. For now, you’ll want to maintain more open permissions so you can verify that basic connectivity is working. Later, however, you should configure SharePoint to accept messages only from Exchange.
Testing connectivity between Exchange and SharePoint
Once you’ve mail-enabled your SharePoint document library, you should test your ability to send email to the library. Start by opening Outlook and sending a message to the address that you assigned.
At first, I had difficulty getting messages to flow between Exchange and SharePoint. When I looked into this, I discovered two things:
- Because I was working in a lab environment, Exchange didn’t know how to route mail to my SharePoint server. To fix this, I had to set up a send connector that created a path from Exchange to SharePoint.
If you need to create a send connector, open the Exchange Management Console (EMC) and navigate to Organization Configuration -> Hub Transport. Click the New Send Connector link and Exchange will launch the New Send Connector wizard.
You’ll need to provide a name for the send connector and specify its use. In this case, I set the use as Internal.
Click Next and the wizard will ask you to specify the address space that the connector will route mail to. Click the Add button and type your SharePoint server’s FQDN into the Address field. If you have multiple SharePoint servers, you’ll want to use the FQDN of the server that’s acting as the Web front end.
Click OK and then Next. Exchange Server will ask if you would like to route mail through any smart hosts. To do so, click the Add button, then specify the IP address of the SharePoint server that’s acting as an SMTP server.
Click Next and Exchange will prompt you to provide smart host authentication credentials. There aren’t any now, so click Next. Click Next again and then click New to create the send connector. - I also had a problem getting messages to appear in my SharePoint document library without refreshing the Web browser.
Figure 5 shows the results of sending two messages to SharePoint. One message had a file attached; that file (Hosts) was detached from the message. Refreshing the browser should fix this problem.
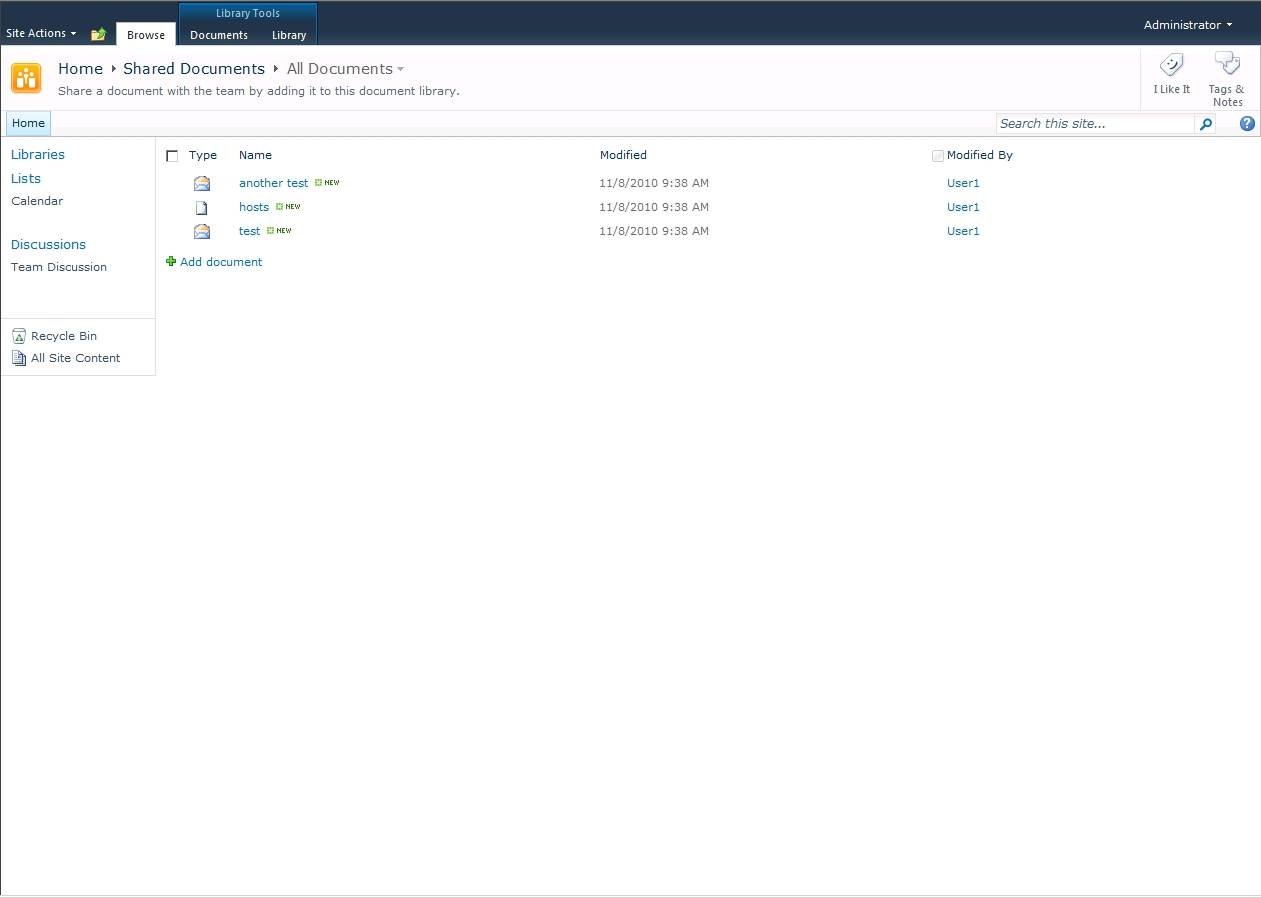
Figure 5. You must refresh your browser before messages show up in the document library.
1 comment:
geotorelxzp low rate loans
consolidate credit card debt
Post a Comment